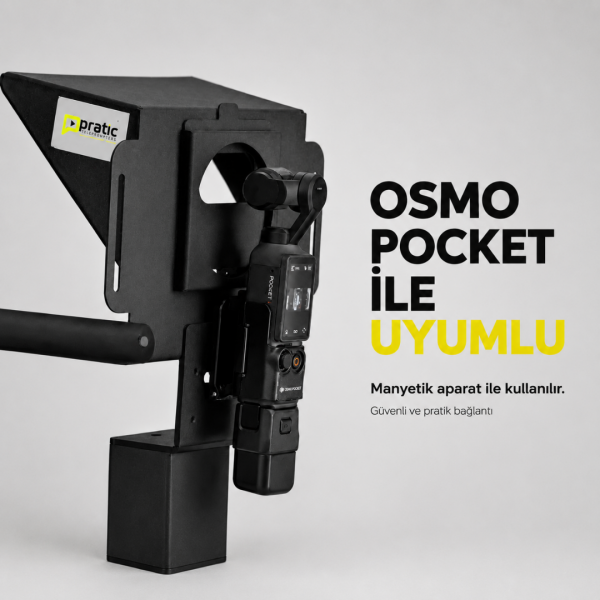
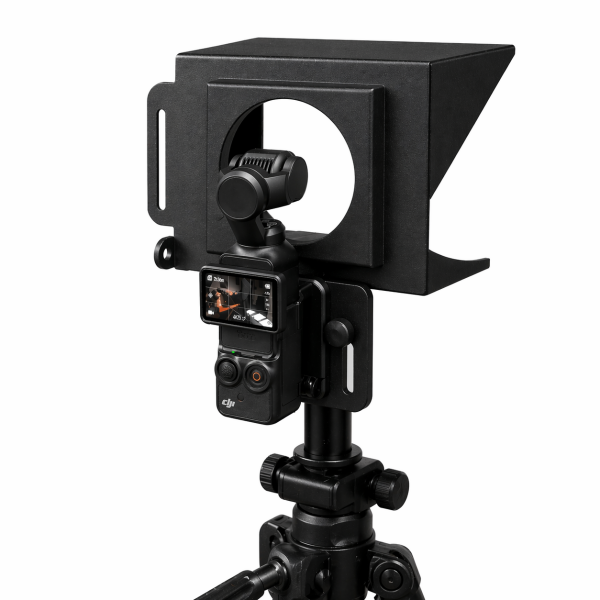
DJI Osmo Pocket teleprompter use is a practical solution for creators who want smooth, professional videos without memorising a script. DJI Osmo Pocket models can be used with Pratic Teleprompter.
How Is DJI Osmo Pocket Mounted?
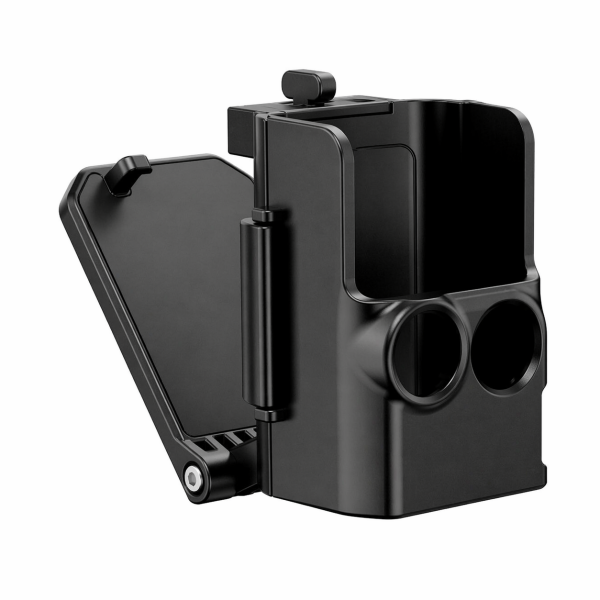
The specially designed magnetic Osmo Pocket adapter holds the camera and attaches to the metal body of the teleprompter. No complicated screw system is required.
- Place the Osmo Pocket in the magnetic adapter.
- Attach the adapter securely to the teleprompter body.
- Place your phone in the text-reflection area.
- Open your script in the Pratic Prompter app.
- Adjust the text size and scrolling speed.
- Check framing and start recording.
How Does the Teleprompter Work?
The phone displays the script on special beam-splitter glass. The camera records through the glass while you read near the lens, creating natural eye contact with viewers.
Which Videos Is It Suitable For?
- YouTube and Instagram Reels
- TikTok and Shorts
- Training and product videos
- Interviews and corporate presentations
- Solo content production
Tips for Better Results
- Keep sentences short and conversational.
- Position the script close to the lens.
- Use a speed that matches your natural speech.
- Test focus and exposure before recording.
Watch the setup and usage videos, explore the Pratic Prompter app and view all prompter devices.
Why Use DJI Osmo Pocket with a Teleprompter?
DJI Osmo Pocket cameras combine a compact body, stabilized image and fast setup. Adding a teleprompter makes this small production system suitable for scripted videos in which direct eye contact is important. The presenter can follow prepared lines without placing notes beside or below the camera.
This combination is practical for travel content, interviews, product introductions, vertical social-media videos, lessons and professional talking-head recordings. The key is a secure adapter that positions the Osmo lens correctly behind the beam-splitter glass.
How the Magnetic Adapter Works
The Pratic adapter creates a stable connection between the Osmo Pocket and the teleprompter body. The camera lens must sit behind the clear recording area, while the phone displaying the script remains below the glass. Correct alignment prevents the teleprompter frame or dark cover from entering the shot.
Before tightening or finalizing the setup, open the camera preview and check every corner of the image. Rotate or reposition the adapter if any edge is visible. Complete this check again whenever you change orientation, lens mode or shooting distance.
Step-by-Step Setup
Mount the teleprompter securely, attach the magnetic Osmo adapter and connect the camera. Place the script phone in its holder, enable mirror mode in the app and center the text. Then close the dark cover around the camera area to block external reflections.
Start with a short test recording. Check focus, exposure, audio, framing and eye position. A thirty-second test is usually enough to identify alignment or speed problems before a long presentation is recorded.
Vertical and Horizontal Recording
Vertical orientation is preferred for Reels, Shorts and TikTok-style content, while horizontal framing is better for YouTube, courses and corporate presentations. The adapter and teleprompter must be checked after changing orientation because the usable image boundaries also change.
Keep the presenter near the center and leave enough space for subtitles or graphics. When using wide-angle settings, inspect the frame carefully because very wide views may reveal equipment at the edges.
Script and Reading Settings
Use short lines and a font size that can be read without visible eye movement. Set the scrolling speed according to speech rather than video duration. A natural delivery with controlled pauses produces a more professional result than trying to finish the script as quickly as possible.
Divide the script into sections and rehearse difficult names or numbers. A Bluetooth remote allows the presenter to pause or resume the text, which is valuable when recording alone.
Focus, Exposure and Reflections
Clean both sides of the beam-splitter glass before recording. Position strong lights so they do not reflect directly into the glass, and keep the inside of the dark cover closed. Lock exposure and white balance when the lighting is stable to avoid visible brightness or color shifts during speech.
The glass is designed to transmit the camera image while reflecting the script. Correct alignment and good-quality glass preserve detail and contrast; most visible problems come from poor lighting angles, dirty glass or an opening in the dark cover.
Audio and Solo Production
The Osmo Pocket can produce strong video, but clear speech also requires careful audio. Use an appropriate wireless or wired microphone when the camera is far from the presenter, monitor the input level and record a short sound test.
For solo production, prepare the frame, text speed and remote control before taking position. Mark your standing point on the floor so the reading distance remains consistent between takes.
Common Setup Mistakes
The most frequent mistakes are mounting the lens off-center, using text that is too small, leaving the cover open and selecting an excessively wide camera view. Another common problem is tightening the equipment before checking the live preview. Build the setup in stages and verify the image after each change.
Frequently Asked Questions
Does the adapter support professional recording?
Yes. When mounted correctly, it provides a compact setup for scripted professional and social-media productions.
Can I control the text while recording alone?
Yes. Use a compatible Bluetooth remote or the available remote-control features of the Pratic Prompter app.
Will the teleprompter appear in the frame?
It should not. Check the live preview and realign the adapter if the glass frame or cover appears at any edge.
DJI Osmo Pocket Setup: Images and Video